Introduction
Welding as a hobby holds great importance in New Zealand, as it allows individuals to showcase their creativity and craftsmanship.
DIY welding projects are gaining popularity among hobbyists, offering a wide range of opportunities to create unique and functional items.
Welding, defined as the process of joining two or more metal components by melting and solidifying them together, has become a popular pastime for individuals in New Zealand.
As a hobby, welding allows people to explore their artistic side while acquiring valuable skills in metalwork.
In New Zealand, DIY welding projects have become a favored choice for hobbyists. These projects offer an exciting and rewarding way for individuals to express their creativity and passion for metalworking.
From creating sculptures and garden ornaments to fabricating furniture and decorative pieces, the possibilities are endless.
Hobbyists can start with beginner-friendly projects like welding a wine rack, metal picture frames, or garden trellises.
Advanced hobbyists may choose to undertake more complex projects such as welding a barbecue grill, patio furniture, or even a custom-designed trailer.
With the availability of affordable welding equipment and materials, the accessibility to DIY welding projects has increased in New Zealand.
Additionally, various online resources and communities provide tutorials, tips, and support for hobbyists, making it easier for them to learn and improve their welding skills.
In essence, welding as a hobby offers a unique blend of creativity, craftsmanship, and practicality in New Zealand.
DIY welding projects provide an avenue for individuals to explore their passion for metalworking while creating personalized and functional items.
The next section will delve into specific DIY welding projects suitable for hobbyists.
Welding Safety
Welding can be a rewarding hobby, but it’s important to prioritize safety while working with high heat and potentially hazardous materials.
By taking proper precautions, hobbyists in New Zealand can ensure a safe and enjoyable welding experience. Here are some essential tips:
Importance of safety precautions when welding:
- Adhering to safety precautions can prevent accidents and injuries during welding projects.
- Protective measures ensure personal safety and the well-being of those nearby.
- Ignoring safety measures can lead to serious burns, eye damage, electric shocks, or inhalation of toxic fumes.
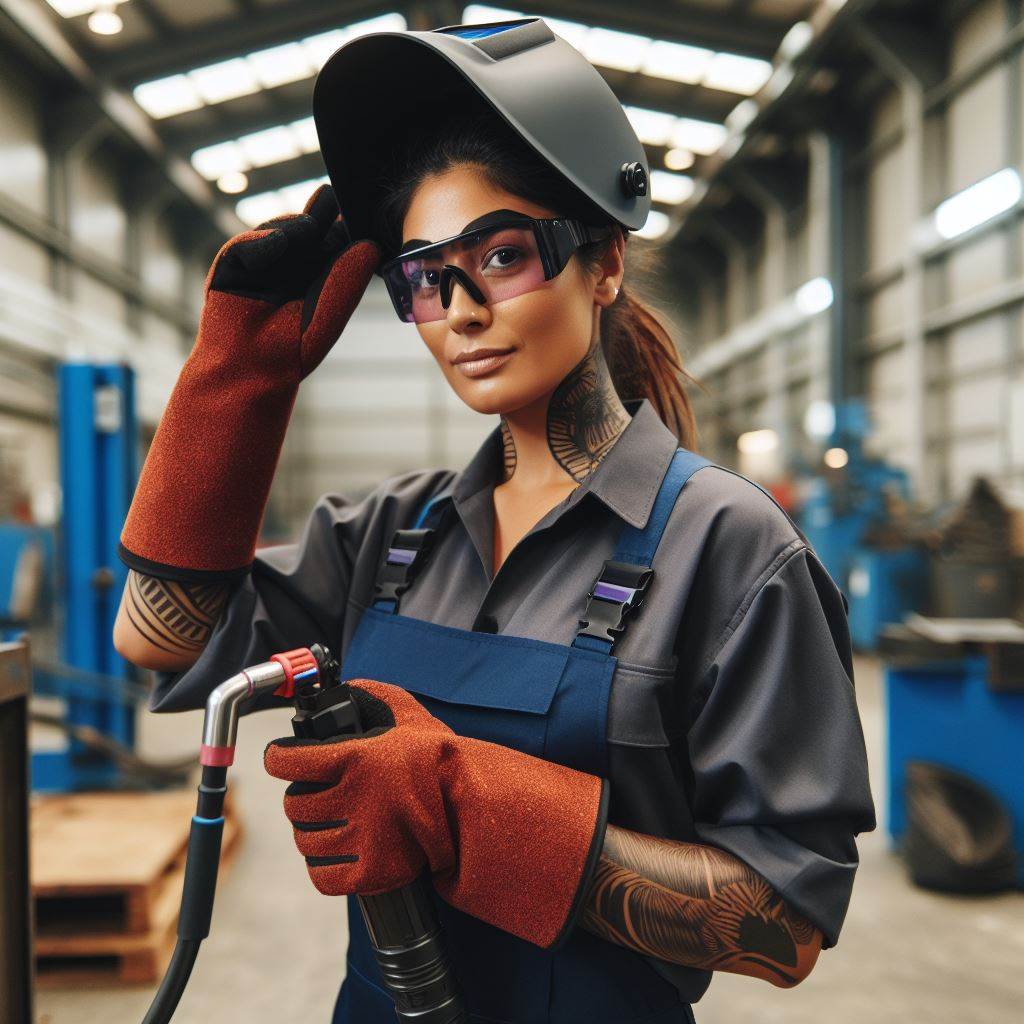
Necessary safety equipment and gear
- Wear a welding helmet with a proper shade level to protect your eyes from intense light.
- Use flame-resistant clothing, such as a welding jacket and pants, to shield your skin from sparks and heat.
- Wear leather gloves and boots to protect your hands and feet from burns and falling objects.
- Use earplugs or earmuffs to reduce the risk of hearing damage caused by loud welding noises.
- Use a welding respirator or a mask with appropriate filters to prevent inhaling harmful fumes and particles.
Tips for ensuring a safe welding environment
- Set up your welding area in a well-ventilated space to avoid the accumulation of welding fumes.
- Clear the workspace of flammable materials, like paper, cloth, and chemicals, to prevent fire hazards.
- Ensure there are no water sources near your welding area to minimize the risk of electric shocks.
- Inspect your welding equipment regularly to identify any damaged parts and replace them as necessary.
- Keep a fire extinguisher nearby that is suitable for extinguishing electrical fires.
- Always have a first aid kit in your welding area to quickly address minor injuries or burns.
- Take breaks during long welding sessions to prevent fatigue, which can compromise your safety awareness.
- Educate yourself about the specific hazards associated with the materials you will be welding.
- Never weld alone; having a buddy nearby increases safety by providing immediate assistance in emergencies.
Remember, the goal of any welding project should always be to complete it safely and effectively.
By implementing these safety precautions, hobbyists in New Zealand can enjoy their welding projects with confidence and peace of mind.
Welding Basics
- Explanation of different welding techniques commonly used by hobbyists (e.g., MIG, TIG, stick welding)
- Overview of welding materials and equipment
- Understanding welding metals and their applications in projects
Welding is a fundamental skill that every DIY enthusiast should learn. Whether you’re a beginner or an experienced hobbyist in New Zealand, understanding the basics of welding is essential.
In this section, we will explore different welding techniques commonly used by hobbyists, discuss the various materials and equipment required.
Delve into the fascinating world of welding metals and their applications in projects.
To start off, let’s familiarize ourselves with the different welding techniques commonly used by hobbyists.
MIG (Metal Inert Gas) Welding
MIG welding involves the use of a consumable wire electrode and a shielding gas to create a strong bond between metals.
It is known for its versatility and ease of use, making it a popular choice among beginners.
TIG (Tungsten Inert Gas) Welding
TIG welding utilizes a non-consumable tungsten electrode and a shielding gas.
It offers precise control over the welding process and is commonly used for thin or delicate materials. Although it requires more skill and practice, TIG welding produces high-quality welds.
Stick Welding
Stick welding, also known as Shielded Metal Arc Welding (SMAW), involves the use of a flux-coated electrode that melts and forms the weld.
It is a robust and versatile technique that can be used in various applications, including outdoor projects.
Now that we have an understanding of the different techniques, let’s move on to the materials and equipment required for welding.
Welding Materials
Welding requires the use of specific metals suitable for bonding. Common welding metals include carbon steel, stainless steel, and aluminum.
Each metal has its own unique properties and applications, so it’s essential to choose the right material for your project.
Welding Equipment
To perform welding tasks, you will need the following equipment:
Personalized Career Consulting
Unlock your potential with expert career advice tailored to your goals. Get personalized guidance and actionable steps toward your dream career in New Zealand.
Get Started- Welding machine: Whether it’s a MIG, TIG, or stick welder, choose a machine that suits your needs and budget.
- Safety gear: Welding produces intense heat, sparks, and harmful fumes, so ensure you have protective clothing, gloves, helmet, and goggles.
- Accessories: Various accessories like welding clamps, wire brushes, and chipping hammers aid in the welding process.
Lastly, let’s explore the different applications of welding metals in DIY projects
Carbon Steel
Carbon steel is widely used in DIY projects due to its strength and affordability. It is commonly used in building structures, furniture, and automotive applications.
Stainless Steel
Stainless steel is known for its corrosion resistance and aesthetic appeal. It is often used in projects involving kitchen appliances, decorative items, and outdoor furniture.
Aluminum
Aluminum is lightweight and has excellent conductivity. It is commonly used in projects such as automotive parts, aircraft structures, and marine applications.
In fact, understanding welding basics is crucial for hobbyists in New Zealand.
By knowing different welding techniques, the required materials and equipment, and the applications of welding metals, you can confidently embark on your DIY welding projects.
Remember to prioritize safety and practice proper techniques to achieve excellent results. Happy welding!
Essential Tools for DIY Welding Projects
When it comes to DIY welding projects, having the right tools is essential for a successful outcome.
Whether you are a beginner or an experienced hobbyist, investing in quality tools will ensure that you achieve professional-looking results.
Here is a list of basic tools required for welding projects, along with recommended brands and tips for selecting the right tools based on your project needs and budget:
Welding Machine
- A welding machine, also known as a welder or welding power supply, is the most important tool in any welding project.
- Brands like Lincoln Electric and Miller Electric are highly recommended for their reliability and performance.
- Consider the type of welding you plan to do (MIG, TIG, or Stick) and your budget when selecting a welding machine.
A Welding Helmet
- A welding helmet protects your face and eyes from sparks, UV radiation, and infrared light.
- Brands like 3M Speedglas and Miller Electric offer high-quality welding helmets with auto-darkening filters.
- Choose a helmet that provides a comfortable fit, adjustable headgear, and variable shade settings.
Welding Gloves
- Welding gloves protect your hands from heat, sparks, and burns while providing dexterity for welding tasks.
- Brands like Tillman and Lincoln Electric offer durable gloves with heat-resistant materials.
- Look for gloves that are thick enough to provide adequate protection but also allow for flexibility.
A Welding Apron
- A welding apron protects your body and clothing from sparks, molten metal, and welding splatter.
- Brands like Revco and Black Stallion offer high-quality welding aprons made from flame-resistant materials.
- Choose an apron that provides full coverage, has adjustable straps, and is comfortable to wear for extended periods.
Welding Clamps
- Welding clamps are essential for holding metal pieces together during the welding process.
- Brands like Strong Hand Tools and Irwin offer a wide range of welding clamps suitable for various projects.
- Consider the size and type of clamps needed for your project, such as C-clamps, angle clamps, or locking pliers.
Angle Grinder
- An angle grinder is a versatile tool that can be used for cutting, grinding, and polishing metal.
- Brands like Dewalt and Makita offer reliable and powerful angle grinders with different disc sizes.
- Choose an angle grinder that suits your project requirements and has adjustable speed settings for precision.
Chipping Hammer
- A chipping hammer is used to remove slag and welding spatter after welding.
- Brands like Hobart and Estwing offer sturdy chipping hammers with comfortable grips.
- Look for a chipping hammer that is lightweight and has a chisel and pick combination for versatility.
Wire Brush
- A wire brush is essential for cleaning metal surfaces before welding to ensure proper adhesion.
- Brands like Weiler and Norton offer wire brushes with durable bristles for effective cleaning.
- Choose a wire brush with a comfortable grip and different brush sizes for various cleaning tasks.
Safety Glasses
- Safety glasses protect your eyes from flying debris, sparks, and harmful UV radiation.
- Brands like Uvex and Gateway Safety offer safety glasses with impact-resistant lenses.
- Choose safety glasses that fit securely and have a wraparound design for maximum eye protection
By investing in these essential tools and selecting the right brands based on your project needs and budget, you can embark on your DIY welding projects with confidence.
Remember to prioritize safety by wearing protective gear and adhere to proper welding techniques. Happy welding!
Read: Carpentry 101: A Guide for Kiwi Beginners
Beginner-Friendly Welding Projects
Are you a hobbyist in New Zealand looking to get started with welding projects?
Whether you’re a complete beginner or have some experience, this section will guide you through simple and rewarding projects that anyone can tackle.
From making a garden gate to creating decorative metal art, there’s something for everyone!
Introduction to Simple Welding Projects for Beginners
If you’re new to welding, it’s essential to start with projects that suit your skill level and equipment. Here, we’ll introduce you to beginner-friendly ideas that will build your confidence and enhance your welding skills.
Step-by-Step Instructions for Making a Garden Gate
A garden gate not only adds functionality but also enhances the overall aesthetic appeal of your outdoor space. Follow these step-by-step instructions to create a sturdy and visually appealing garden gate:
- Measure the desired width and height for your garden gate using a tape measure.
- Take note of the measurements and gather the required materials such as metal bars, hinges, and a latch.
- Cut the metal bars according to your measurements using a saw or a plasma cutter.
- Clean the metal bars with a wire brush to ensure proper weld penetration and remove any rust or debris.
- Position the bars together and use clamps to hold them in place.
- Preheat the metal bars with a welding torch and then begin welding them together.
- Ensure strong and clean welds by maintaining a steady and consistent welding technique.
- Attach the hinges and latch to the completed gate, ensuring smooth movement and secure closure.
- Paint or coat your gate to protect it from rust and to add a personal touch.
- Install your beautifully crafted garden gate and enjoy the satisfaction of completing your first welding project!
Tips for Creating a Basic Welding Cart
A welding cart is a handy tool for organizing your equipment and easily moving it around. Here are some tips to help you create a basic welding cart:
- Select a sturdy metal frame that can support the weight of your welding machine and other tools.
- Add wheels to the cart, ensuring they are durable and can handle the load.
- Design compartments and shelves to store your welding accessories and safety gear.
- Securely attach a gas cylinder holder to the cart to ensure safe transportation.
- Don’t forget to include a fire-resistant mat or tray to catch any sparks or debris.
- Consider adding hooks or hangers for convenient storage of cables and welding helmets.
Suggestions for Beginner-Level Decorative Metal Art Projects
If you want to explore the artistic side of welding, here are some beginner-level decorative metal art projects:
- Create a metal sculpture using recycled materials, such as old spoons, forks, and scrap metal.
- Design and weld a unique metal wall clock that becomes a conversation piece.
- Make a metal flower or tree sculpture to add a touch of nature-inspired beauty to your living space.
- Construct a metal wine rack that showcases your welding skills while serving a practical purpose.
- Incorporate metal elements into furniture, such as coffee tables or bookshelves.
Remember, the key to success in welding projects is practice. Start small, gradually taking on more complex projects as you gain confidence and skills. Have fun and let your creativity flow!
Read: Top Carpentry Courses in New Zealand
Transform Your Career with a Professional CV and Cover Letter
Stand out to employers with an ATS-optimized resume and tailored cover letter designed to match your dream role. Let us craft your job application materials for success!
Get Started
Intermediate Welding Projects
Are you an intermediate hobbyist looking to take your welding skills to the next level? Here are some examples of more challenging welding projects that will test your abilities:
Fire Pit or Barbecue Grill
If you enjoy spending time outdoors and cooking, building a fire pit or barbecue grill is a great intermediate welding project. You can design and customize it to fit your specific needs
Workbench or Tool Storage Rack
A workbench or tool storage rack is a practical project for intermediate welders who want to organize their tools and create a functional workspace.
Garden Trellises or Plant Stands
If you have a green thumb and want to showcase your plants, welding garden trellises or plant stands can elevate the aesthetics of your garden.
Undertaking these intermediate welding projects will help you improve your welding skills while creating functional and visually pleasing items for your home or garden.
Remember to prioritize safety and practice proper welding techniques throughout the process.
Read: NZ Carpentry: Skills and Tools Needed
Advanced Welding Project
Experienced hobbyists can tackle intricate welding projects to hone their skills and unleash their creativity.
Manufacturing a custom motorcycle frame requires precise measurements, strategic welding techniques, and attention to detail.
Begin by sketching out the frame design, ensuring proper proportions and structural integrity.
Select high-quality steel tubing for the frame, considering factors such as strength, weight, and aesthetics.
Cut the tubing to the required lengths using a bandsaw or a chop saw with a metal-cutting blade.
Use a welding jig to hold the tubing in place while welding, ensuring alignment and accuracy.
Employ TIG welding for precise, clean welds, paying close attention to heat control and filler metal selection.
Once the frame is welded together, check for any imperfections and make necessary adjustments before proceeding.
Boost Your Career with a Standout LinkedIn Profile
Attract recruiters and expand your network with a fully optimized LinkedIn profile tailored to highlight your strengths and professional goals. Let your profile open doors to new opportunities!
Get OptimizedDesigning a small trailer involves planning the layout, determining the dimensions, and selecting suitable materials.
Building a Durable Trailer: Construction and Finishing Tips
Choose durable materials such as steel or aluminum for the trailer frame and panels, ensuring strength and longevity.
Cut and weld the frame components together according to the design specifications, ensuring structural integrity and stability.
Attach the trailer axles, wheels, and suspension system, ensuring proper alignment and functionality.
Fabricate the trailer panels using sheet metal or aluminum, incorporating features such as doors, windows, and storage compartments.
Weld the panels to the frame securely, sealing any seams or joints to prevent water infiltration and corrosion.
Add finishing touches such as paint or powder coating to enhance the trailer’s appearance and durability.
Crafting artistic sculptures or furniture items allows hobbyists to explore their creativity and showcase their welding skills.
Crafting Artistic Metalwork: From Concept to Display
Start by conceptualizing the design, considering factors such as form, function, and aesthetic appeal.
Choose suitable materials such as steel, stainless steel, or aluminum, depending on the desired look and durability.
Use cutting and shaping techniques to manipulate the metal into the desired forms and contours, adding texture and detail as needed.
Employ various welding techniques such as MIG, TIG, or oxy-acetylene welding to join the metal components together seamlessly.
Pay attention to details such as weld bead appearance, joint strength, and overall craftsmanship to ensure a high-quality finish.
Incorporate additional elements such as wood, glass, or other materials to complement the metalwork and enhance the final piece.
Finish the sculpture or furniture item with surface treatments such as grinding, polishing, or patination to achieve the desired aesthetic effect.
Display the finished piece proudly, knowing that it represents the culmination of skill, creativity, and craftsmanship in welding.
Read: Carpenter Apprenticeships in NZ Explained
Additional Resources and Support
Here are some valuable additional resources and support systems for New Zealand welding hobbyists to enhance their skills and knowledge:
Online Platforms and Forums
- WeldingForum.co.nz: An active online community where you can connect with fellow enthusiasts, ask questions, and share your DIY welding projects.
- MetalTalk.com: A platform that offers welding-related discussions, tips, and techniques for both beginners and experienced welders.
- Facebook Groups: Join local welding groups on Facebook to network with other hobbyists, find inspiration, and seek advice.
Local Welding Classes and Workshops
- Ultimate Welding Course: A comprehensive welding course offered by reputable institutions throughout New Zealand, suitable for beginners and intermediate welders.
- Community Education Centers: Many community centers provide affordable welding classes for hobbyists, offering hands-on practice and expert guidance.
- Technical Institutes: Check out technical institutes near you, as they often offer welding programs that cater to various skill levels.
Tips for Finding Mentorship or Joining Welding Communities
- Local Welding Associations: Joining a local association can help you connect with experienced welders who can serve as mentors and provide guidance.
- Attending Trade Shows and Exhibitions: Participate in welding trade shows and exhibitions, where you can meet professionals who are passionate about welding and exchange insights.
- Networking Events: Search for networking events in your area specifically aimed at welders, as these can be great opportunities to meet like-minded individuals.
- Approach Professional Welders: Reach out to professional welders in your community and inquire about the possibility of mentorship or shadowing opportunities.
- Online Welding Communities: Join online forums, social media groups, and discussion boards dedicated to welding to connect with a vast network of welders.
Remember, in your journey as a welding hobbyist, it’s crucial to not only rely on your own skills and techniques but also seek support from experienced welders and engage with fellow enthusiasts.
The welding community in New Zealand is vibrant and welcoming, so take advantage of the resources available to further enhance your DIY welding projects.
With the right guidance, practice, and dedication, you can turn your hobby into a lifelong passion.
Conclusion
In closing, DIY welding projects offer immense importance and versatility for hobbyists in New Zealand.
The ability to create and repair various items through welding opens up a world of possibilities.
Throughout this blog, we have explored the numerous advantages that welding projects bring to hobbyists.
DIY welding not only saves money but also allows individuals to showcase their creativity and talent.
We have seen how welding can be used to construct furniture, garden art, and even small-scale sculptures.
The versatility of welding allows hobbyists to personalize their projects and bring their ideas to life.
By engaging in DIY welding projects, New Zealand hobbyists can gain valuable skills and knowledge in metalworking.
This enables them to take on more ambitious and complex projects in the future.
It is our hope that this blog has sparked interest and curiosity in readers to explore welding as a rewarding hobby.
We encourage all readers to take the plunge and discover the art of welding for themselves.
With dedication and practice, anyone can excel in welding and transform simple materials into extraordinary works of art.
So why not embark on this creative journey and unleash your inner welding enthusiast?
Remember, DIY welding projects offer a unique combination of satisfaction, practicality, and artistic expression. So pick up a welding torch and start turning your ideas into reality!